Stabilizing Shoulder Seams

Until recently, all my cut and sew sweater sleeves had set-in sleeves. I either "dropped the sleeves in the hole" or sewed them in flat, but in the end they were definitely set in and my shoulders were stable. It's necessary to stabilize the shoulders of the cut and sew sweater for one very good reason -- gravity. The weight of the sleeve will pull down on the shoulder seam. If that seam hasn't been stabilized, the seam will stretch and "grow". This time it's not the temporary stabilization used to keep a cut edge from raveling. I see this as permanent stabilization, and there are several ways to do this. I use good old fashioned Stay Tape, so simple, lightweight and reliable.


The following steps are really an expansion of "Step 1" from Steps for Sewing a Sweater. I hope the extra explanations make things clearer.

Stabilizing Shoulder Seams

Step 1. Measure the Stay Tape against the shoulder seam line on the paper pattern and cut to size. (The paper pattern doesn't stretch and we want to get the size right.)

Step 2. Cut a second piece of Stay Tape, identical in size to the first for the second shoulder.

Step 3. Pin or glue-baste* the Stay Tape to the wrong side of the front shoulder (or  back shoulder, if you prefer) centering it on the seam line.

Step 4. (Optional) Machine baste the Stay Tape at the very upper edge of the tape.

Step 5. With right sides together, pin (or use binder clips) to hold Front and Back pieces together.

Step 6. With a balanced 4-thread overlock stitch, serge shoulder seams, removing pins (or binder clips) before they reach the blade. (The left needle sews on the seam line.) The blade doesn't cut the Stay Tape. It just trims the main fabric. If the blade does trim a little of the tape, don't worry about it.
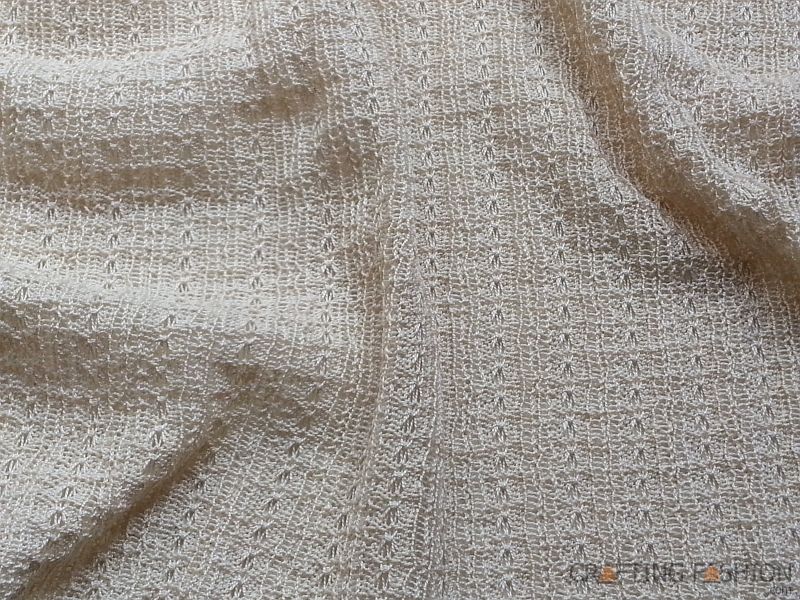
Stay Tape at the shoulder seam of  theTurtle Beach sweater


It's easy and worth it. What's not so easy was what I decided to do last week -- a sweater with raglan sleeves, my Moonstone Sweater. Because the fabric I'm using has one of my open work designs, I decided to finally try transparent elastic for stabilizing. It was my very first time. For raglan seams I'd be stabilizing the front and the back because the sleeve slips in between. The red lines are where I placed the clear elastic.
Click to enlarge.

My research yielded no exact instructions on how to tape raglans. I ended up following the instructions entitled "To Tape an Armhole Seam" in Turbett's Revised Knit, Cut and Sew: Bk. 1. These instructions were not supposed to be for a raglan; they were clearly for the armscye of a set-in sleeve. (Btw I have yet to do that for my set-in sleeves.) Needless to say, I had to modify the instructions greatly.

I ended up taping in a way that was similar to my shoulder seams. By the 6th time (2 practices + 4 for reals), I felt confident. But so far, I much prefer woven Stay Tape or the fusible knit interfacing I've fooled around with, but never used in a garment. There exists a fusible knit stay tape. I may try this one day.

Here's my problem with the clear elastic. I'm essentially sewing something stretchy to something else that's stretchy, one of which I want stabilized. Now it's true that the elastic has perfect recovery, but I feel I have no control over the stretch as I'm sewing it in. Maybe I just need practice, but I won't be using it again for quite awhile, especially since I have something that does work for me. If I must stabilize something lacy again, and I don't have tape or interfacing that matches, perhaps I'll try dyeing the tape or interfacing. Has anyone tried this?

Below is a pic of one of my raglan seams, still unsteamed, as I was afraid of deactivating my Solvy (Temporary) Stabilizer still in play at the neckline. (See previous post.) And since I'm assuming clear elastic melts at high temperature, I've gone over the seam with a very light pressing through cheesecloth with a dry(!) iron set at "silk".  After my neckline is finished, and I wash the sweater to remove all the Solvy and chalk marks, and I've allowed it to air dry, I'll give the sweater a really good steaming. I'm hoping that the raglan seams will be nice and flat then. And even if they are unlumpy, I'm not going to use transparent elastic again for a very long time.
Lumpy seam on the Moonstone Sweater


*And now for a product I do love... I used the term "glue-baste" way back in Step 3, and the more I use this stuff, the more I love it.
 
It's Collins Fabric Glue Stick Basting Adhesive [affiliate link]. It works amazingly well on my textured sweater knit fabrics, it doesn't gum up the needles, and it comes out easily in the wash. Though I did not use this product with the clear elastic, during this project I managed to became an expert with the glue stick. (The learning curve is not very steep.) Honestly, I could do a whole post on Collins Fabric Glue Stick, and maybe I will one day, hmmm....

Next week, however, for better or worse, I plan to reveal my Moonstone Sweater. Now to finish that thing!

O!

---
Updated 1Apr2013

Stabilizing a Sweater Knit Fabric

Ravel or unravel? Funny that these words are considered synonyms.  Anyway, despite what many say about knit fabrics not raveling (or unraveling) or fraying, it simply isn't true for a sweater knit fabric.
The raveling begins. And yes, I pulled the yarn of this cotton knit fabric just for this pic!


But the fact that a sweater knit fabric might ravel shouldn't scare you away. Most well prepared wool fabrics will experience little raveling or fraying as you put the cut fabric through it's paces serging and sewing. Wool, even the superwash variety, will full a bit in the preparation. This makes the fibers stick to each other enough to survive the normal stretching involved in constructing the garment without an incident of raveling.

I got my first taste of what terrible thing might happen while constructing the Turtle Beach Sweater. The main sweater fabric is 86% bamboo. The 14% merino mostly manages to hold the cut edges together, but there was one spot where I mishandled the fabric, playing around and stretching the neckline, and I got the beginning of a run that I feared would eat away my seam allowance. (For the record, it didn't.)

I am now in the midst of making a cotton knit sweater for summer using this fabric.

This loose cotton knit, will definitely have the tendency to run. But there is a solution. Actually, a solution is the solution. I made a paint-on stabilizer solution with Sulky Super Solvy(Amazon affiliate link). The instructions for making the solution are included in the package.
Sulky Super Solvy (Amazon affiliate link)
The product comes on a roll. Here's what the stabilizer looks like before the solution is made.

In its solid form, Super Solvy is used to make design templates and pattern guides. But by dissolving 18 inches of Super Solvy in 8 ounces of water, painting the solution on the edges of my cut fabric, and allowing it to dry for a couple of hours, I no longer need to worry about runs, ravels, and frays. The edges have a slight crunchy feel; the fabric feeds beautifully into sewing machine or serger. Once I complete the sweater, the crunchy will disappear in the wash.


Next time I'll only make half the recipe. I'm currently storing my remaining solution in an airtight container. I don't know yet how well it keeps.

Working with knit fabric can require other stabilizers, too, such as stay tape, clear elastic or interfacing. I'll get to these another time.

O!

Slash and Turn (Nakamichi Inspired)

Although this has been a very busy week, I did get the chance to work on "Project 2", from my list of personal projects. This is my second piece inspired by Pattern Magic: Stretch Fabrics (affiliate ad link) by Tomoko Nakamichi. Instead of using the sloper provided in her book, I'm using my personal pattern block and drafting the new pattern from that. Because I have my pattern blocks in digital form, I decided to use Inkscape to do all the slash and turn. This is what I have so far.


I'm sure that if you're not familiar with any of Nakamichi's Pattern Magic books, this looks pretty strange. This is the entire front that should be cut in one piece out of the garment fabric. The blue quadrilaterals were part of the original standard dress shape. I slashed and rotated them following Nakamichi's instructions. The red shapes and lines were drawn in the next step. The back will match the front exactly on the bottom. And by the way, I do like Inkscape for this type of pattern drafting.

I already know that my fabric will not be wide enough to accommodate the full width at the bottom of the dress, so I'll cut the front and back in 4 pieces. I think I'll piece it at the leftmost blue line. The finished dress will look something like the drawing below. (The inset is "Sharp and Snappy B" from the book.)

I'm very excited about the fabric I've decided on. Unfortunately, this fabric is still in my imagination, so I'm unable to show a photo yet. It will be a plain jersey (maybe reverse jersey) bamboo, mixed yarns with a cream, gold colorway. I want some type of horizontal patterning so that the stripes become "disturbed" at the bottom of the dress. I've decided to do the patterning with color as opposed to texture. I imagine the knit fabric to look something like this.


My schedule doesn't permit me to return to this project for a little while, so I'll just keep imagining for now.

O!

___
Affiliate links (ads) via Amazon Services LLC Associates Program

Serging in Circles

It never occurred to me before I had my own serger that this would ever be an issue. I think it's because the last time I used a serger (someone else's) I had no need to serge in a circle as one does for necklines or cuffs.

I only realized that this was a task requiring special consideration when I first watched the DVD that came with my new serger. Then I understood. First you slip the edge of the fabric under the presser foot. The fabric is fed to the knife. The knife trims the fabric just before the needles and loopers do their work. If you're serging in a circle there's no edge or starting place to slip the fabric in squarely.

Janome presented a method, that I won't go into here. It probably works well on tightly woven and some knits. It's not a method I'd want to try with a sweater knit fabric, because it essentially requires you to cut away half your seam allowance! The cut is only in one small section, but still....

What I ended up doing was something different. It works great with sweater knit fabric. As demonstrated here, it really could be part of Attaching the Rib Bands to the Garment, but the method can be used in a number a situations. You can use this method when setting in sleeves or attaching cowl to sweater, waistband to skirt or just finishing an edge (that happens to be circular) with your serger.

I'll be demonstrating by attaching a knitted cuff to a sleeve. If you're attaching one piece to another, start this tutorial after you've sewn your side seams, shoulder seams or whatever you need to sew so that you're working with  2 tubes, attaching circle to circle.
On the left is the sleeve. One the right is the cuff, ready to be stitched into a tube.


Step 1. On the wrong side, using tailor's chalk, draw about a one-inch vertical line over one seam. This will be your starting point and ending point. Do this on the piece that will be facing you as you serge.
Ruler is indicating my half-inch seam allowance. 

Step 2. Draw a line at the seam allowance perpendicular to the starting line you drew in Step 1. It will look like the pic below.
The "+" sign marks the place to start stitching with the proper seam allowance.

Now you have the starting line and finish line marked. (It's the same seam line.) The horizontal line (in the picture above) marks the sewing line, which is the path of your left needle.

Step 3. After pinning or clipping your pieces together (refer to Attaching a Rib Band, if applicable), you're ready to start the stitching. Starting at the edge at about 2 inches behind the "starting line", take a running start. That is, begin stitching while gradually cutting into the seam allowance so that by the time your needles have reached the "starting line", your fabric is correctly positioned at the left needle and you'll be serging with the correct seam allowance.
Stitching to the "starting line" and beyond
Step 4. Continue serging around the circle. At some point you will "lap" your first stitches. Keep stitching at the correct seam allowance cutting away those first stitches.
"Lapping" the first stitches


Step 5. Serge a little bit beyond the finish line to lock in the stitches. And it's done!

That's it! And no scary pre-cutting of seam allowances.

O!


Wrapping and Draping

Many years ago I took a class at Parsons School of Design here in New York City. It was called Draping. It was an evening class and Parsons allowed the class to proceed even though at five students, it was one third the usual size. My classmates and I learned the technique of wrapping and draping muslin fabric around a mannequin in order to design (or replicate) a garment. Due to our small class size, we progressed rapidly and our very excellent teacher, Imogene Reznik, not only had the time to teach us core draping skills, she generously taught us core pattern making skills too. After many steps, involving the use of pins, chalk, markers, and a variety straight, square and curved rulers, those who chose to do so, got around to cutting and sewing "the good" fabric. I did not choose that option.

The original goal of this blog was to document the cutting and sewing of my sweater knit fabrics. When I saw Kollabora's Friday Challenge (#fridaychallenge) on the "timeless combo of black and white stripes", I thought I had the perfect motivation to work with a fabric I'd created several years ago, a rippled black and white stripe double knit wool.

I even knew what I was going to do with it. But then I couldn't make the first cut.

Back at Parsons my reason for not cutting "the good" fabric had mostly to do with the fact that I had chosen to do a knock off of a complicated "famous designer" wrap blouse as my final project. And I spent a lot of time doing it. Technically, this was a draping class. The final project had to be a muslin. There were no extra points for a finished public-ready garment. I spent my time getting drape and proper fit and later making pattern pieces just right. I learned a lot. It was time well spent. 

This time I didn't cut the fabric simply because I really like it as a piece of fabric.

Maybe it's just that sometimes the fabric is the finished object. I've enjoyed washing and re-blocking this piece. I don't want to make it into a sweater. Wrapping and draping are just two more things to do with a sweater knit fabric. And it makes an excellent very, big scarf.

I'll return to cutting and sewing next week. Onward.

O!